With Passover soon approaching, I think it’s time for ZOODLE school! Zucchini noodles, or zoodles, have taken the (healthy) food world by storm, and I am all over the trend.
I’m been zoodling for months now, and I’ve come to love zoodles even more than traditional pasta. Besides being fun and easy to make, zucchini noodles are cheap, very low in calories, and you can get lots of noodles out of a single zucchini. If you haven’t hopped on the zoodle train, it’s time for zoodle 101.
There are three popular tools on the market for making zoodles: The Veggetti, The Julienne Peeler and the Paderno Spiralizer. Each tool has it’s pros and cons. Lets get into it!
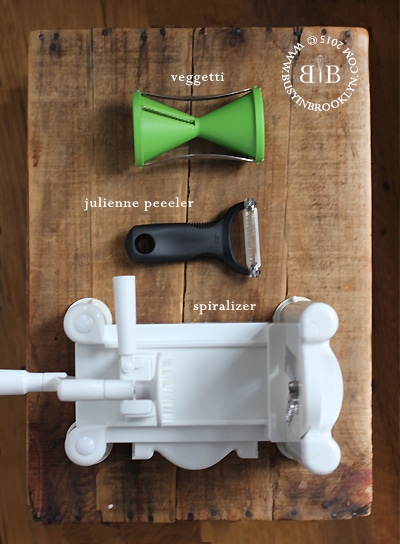
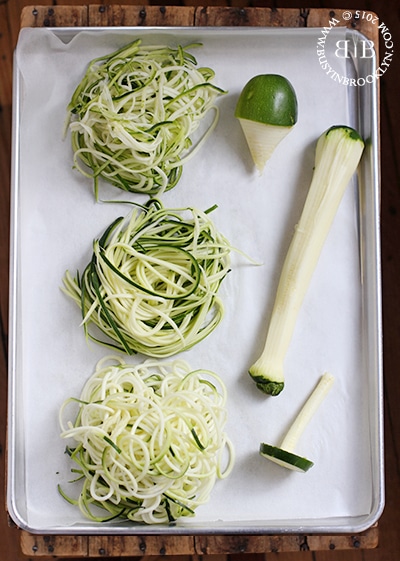
THE VEGGETTI – The veggetti works like a pencil sharpener – each side has a different size blade, one larger and one smaller to yield a thicker or thinner noodle. If you look at the picture below, you can see the leftover zucchini looks like the tip of a sharpened pencil. The veggetti makes long noodles, but perfect ones come with practice. Turning the zucchini is a bit difficult and the results can be a bit scraggly.
PROS: compact, inexpensive ($12-$15)
CONS: You can only make noodles out of veggies that fit in the veggetti opening – up to 2.5″ in diameter.
Purchase here
THE JULIENNE PEELER: A julienne peeler looks like a traditional vegetable peeler, except the blade has little micro blades that cut whatever you are peeling into julienned strips. I prefer the OXO brand.
PROS: compact, inexpensive ($10), easy to use, easy to clean.
CONS: yields the most waste, you get strips and not traditional-looking noodles, only works on straight vegetables that are easy to peel.
Purchase here
THE SPIRALIZER: The spiralizer is the most versatile tool. It allows you to create noodles out of many different vegetables, and even fruits. Any fruit or vegetable that is at least 2.5″ long and at least 1.5″ in diameter can be spiralized. It cannot be hollow or have a pit, and it must be firm. You can spiralize apples, pears, beets, jicama, plantains, kohlrabi, potatoes, sweet potatoes, butternut squash (the neck), turnips and more! The spiralizer also yields the most authentic looking noodle. I prefer the Paderno brand.
PROS: yields the most authentic noodle, various blades yield different noodle shapes, works with a variety of fruits and vegetables, easy to use.
CONS: takes up the most space, not cheap ($30-$40 for the 3-blade and $50 for the new 4-blade), endlessly long noodles tangle and are hard to eat (I recommend cutting them shorter with kitchen shears), hardest to clean (I recommend cleaning immediately otherwise it’s hard to remove dried residue).
Purchase 3-blade, Purchase 4-blade
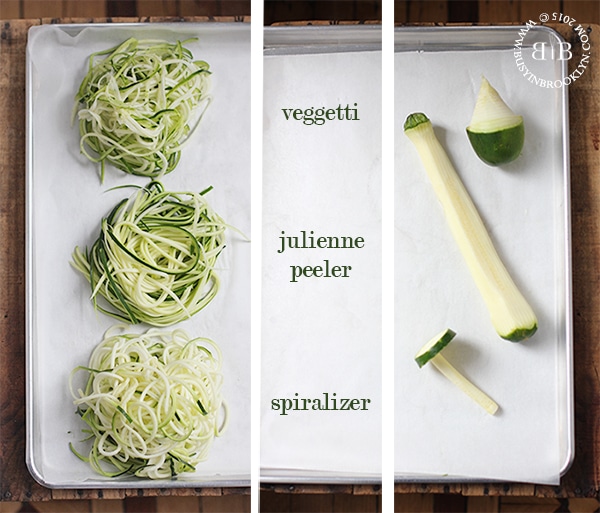
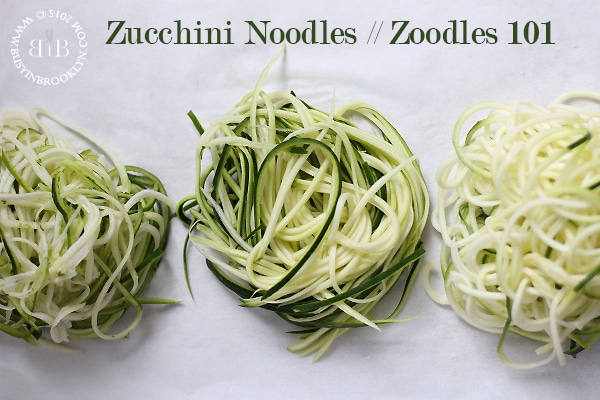
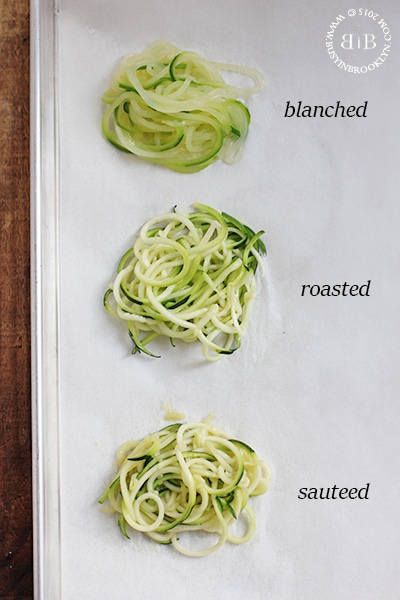
Here you can see how the noodles look based on the tool that was used, and what you have leftover after making the zucchini noodles. Now, lets talk about cooking methods.
BLANCHING – blanching means to cook vegetables quickly in boiling water and then shock them in an ice bath. As you can see below, this yields a mushy noodle. Not recommended!
ROASTING – roasting the zucchini noodles at 400 degrees for about 5 minutes, yields tender zoodles that are evenly cooked.
SAUTEEING – this is my favorite cooking method as it is fast and easy. I saute my zoodles in a wok or large skillet over high heat for about 2-3 minutes for perfectly tender zoodles.
An important point to consider about zoodles, and which tool you want to use to make them, is that zucchini’s have a lot of water. When you use the veggetti or the spiralizer, the seedy center of the zucchini (where most of the water is), get’s incorporated into the noodles. When you use a julienne peeler, you can stop peeling once you reach the seedy portion (in fact you’ll need to, because the strips will just fall apart). Therefore, zoodles made with the julienne peeler have less moisture and won’t water-down your sauces (same goes for cucumbers btw). If you prefer to use a spiralizer or veggetti, one way to solve this problem is to salt the zoodles to draw out some of the moisture. Let the salted zoodles drain in a colander for a few minutes, rinse off the salt and then pat dry on paper towels. I prefer to skip this step. Instead, I only cook my zoodles until tender, and I serve them immeidately (the longer they sit, the more moisture they will emit).
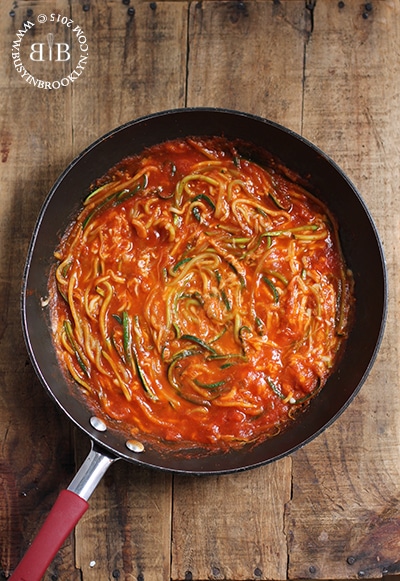
Now that we’ve covered the zoodles – what can you make with them? Well, you are only limited by your creativity! One of my favorite zoodle dishes is this cheesy zoodle marinara. I whip it up for lunch at least once a week! It’s so hearty and indulgent, yet it takes under 5 minutes to prepare. I use the julienne peeler for this because it’s the quickest, and I don’t want my lunch to be a whole to-do. Also, because I don’t use the seedy center of the zucchini, the zoodles don’t water down my sauce.
What else do I make with zoodles? Zoodle Pad Thai (recipe in my ebook), Zoodle Bolognese, Pesto Zoodles with Parmesan, Minestrone Soup with Zoodles, Chicken Zoodle Soup, Miso Soup with Zoodles and more!

And my spiralizer? Well the skies the limit on that! I make everything from rice and risotto to pizza crusts and sandwich buns – all out of vegetables!

Cheesy Zoodle Marinara
1 zucchini, made into zoodles with your preferred tool of choice
2 tsp olive oil
1 cup prepared marinara sauce
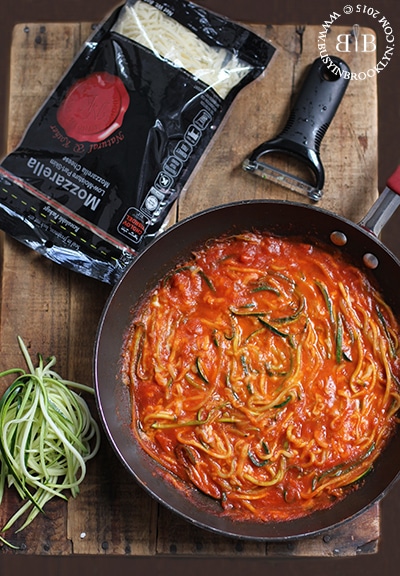
heaping 1/2 cup Natural & Kosher shredded mozzarella
Method:
Heat the olive oil in a large skillet and add the zoodles. Saute for 2 minutes. Add the marinara sauce and bring to a gentle simmer. If your sauce is too thick, add a splash of water. Add the cheese and cook until melted. Serve immediately.
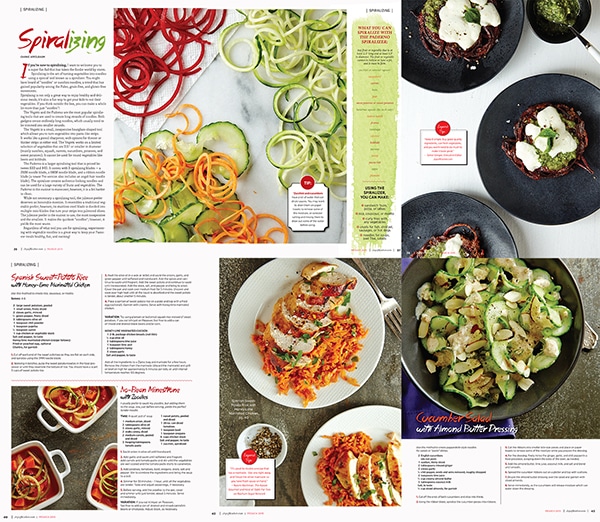
If you’re looking for more recipes using the spiralizer, I’ve got loads of delicious spiralized dishes in this months issue of Joy of Kosher Magazine, so be sure to pick up a copy! You’ll find great Kosher for Passover recipes like beet-crust pizza with arugula walnut pesto and fresh mozzarella, cucumber salad with almond butter dressing, Spanish sweet potato rice with lime marinated chicken and no-bean minestrone with zoodles.
You can also check out the new Inspiralized cookbook by Ali Maffucci of Inspiralized.com.
This post was sponsored by Natural & Kosher Cheese. Follow them on Facebook, Twitter, Pinterest, Instagram, YouTube, Google+, or via their Blog
Other Zoodle Recipes:
spinach white bean minestrone with zoodles
harissa roasted chicken with zoodles
Post a Comment